Welcome to your adventure in mushroom cultivation! If you’ve ever dreamed of harvesting your own fresh mushrooms right at home, our step-by-step tutorial is perfect for you. We’ll break down the process into easy, manageable steps that anyone can follow.
Whether you’re a gardening novice or a seasoned green thumb, you’ll find this guide simple and fun. Get ready to dive into the fascinating world to grow your own mushrooms kit!
Why Grow Your Own Mushrooms?
Before we jump into the steps, let’s quickly touch on why you should consider growing mushrooms at home:
Freshness
Growing your own mushrooms ensures that you always have the freshest possible produce at your fingertips. Unlike store-bought mushrooms, which can sit on shelves for days or even weeks, home-grown mushrooms can be harvested right when they are at their peak. This results in a better flavor and higher nutritional value.
Cost-Effective
Growing your own mushrooms can be surprisingly cost-effective. Initially, you’ll need to invest in some basic supplies like mushroom spores, growing medium, and containers, but these costs are relatively low. Once you have everything set up, the ongoing costs are minimal.
Mushrooms don’t require much space, so you can grow a large quantity in a small area. They also grow quickly, meaning you can harvest and enjoy your mushrooms in a matter of weeks. Since you’re cultivating them yourself, there’s no need to buy mushrooms from the store, which saves money over time.
Variety
One great reason to grow your own mushrooms is the wide variety you can try at home. Stores often offer only a limited selection of mushrooms, like button and portobello. By growing your own, you can explore more exotic types such as shiitake, oyster, and lion’s mane.
Each variety has its own unique flavor and texture, adding different elements to your dishes. Growing a mix of mushrooms can make your cooking more adventurous and diverse.
Environmental Benefits
Growing your own mushrooms at home is good for the planet. Mushrooms can be grown using organic waste and materials, which means less trash ends up in landfills. They also require less water compared to other crops, saving a precious resource.
Because you are growing them at home, there is no need for packaging or transportation, which reduces plastic waste and lowers your carbon footprint. Plus, mushrooms can help improve the soil health in your garden if you use spent mushroom compost. Simple steps like these contribute to a healthier and cleaner environment.
What You’ll Need
First, make sure you have everything you need to get started:
Mushroom Kit
A mushroom kit is an all-in-one solution for growing mushrooms at home. This kit simplifies the cultivation process, making it accessible for everyone. Each kit typically includes pre-inoculated substrate, which is the growing medium where the mushroom mycelium will develop.
Users just need to follow the included instructions to maintain proper moisture and temperature conditions. The mushroom grow kit provides everything necessary to start cultivating mushrooms, ensuring a successful and rewarding experience.
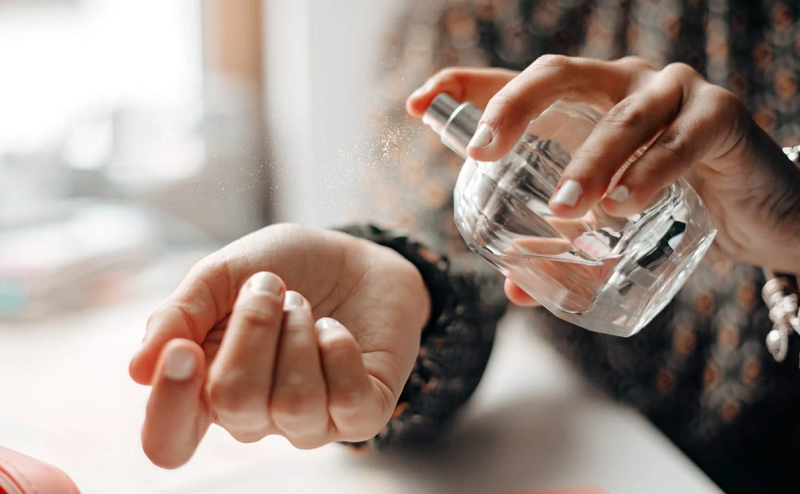
Spray Bottle
A spray bottle is an essential tool in mushroom cultivation. It is used to maintain the moisture level required for the mushrooms to grow. Mushrooms need a humid environment to thrive, and a spray bottle helps achieve that.
Simply fill the bottle with water and mist the growing area lightly. This keeps the substrate and developing mushrooms from drying out. Make sure to mist daily to provide consistent moisture. A clean spray bottle ensures that no contaminants affect the mushrooms.
Clean Space
A clean space is crucial for successful mushroom cultivation. Mushrooms are sensitive to contaminants, so keeping the growing area clean helps prevent unwanted bacteria and mold. Before you start, ensure the space is free from dust and dirt. Use disinfectant wipes to clean surfaces around your growing kit.
Always wash your hands before handling any materials. This reduces the risk of introducing harmful germs to the substrate. Maintaining cleanliness throughout the growing process will increase your chances of a healthy mushroom harvest.
Step-By-Step Guide
Here are the steps to guide you through the process of growing your own mushrooms at home. Follow these instructions closely to ensure a successful and fruitful cultivation experience.
Step 1: Prepare Your Kit
Begin by carefully unpacking your mushroom kit. Place the kit in a clean, well-ventilated area that’s out of direct sunlight but has a consistent temperature. Follow the instructions included with your kit to set up the substrate. Typically, this involves soaking the substrate in water for a specified period to ensure it is adequately hydrated.
Once soaked, drain any excess water to create the optimal environment for mushroom growth. Make sure the substrate is spread evenly in the provided container or bag to facilitate uniform mycelium development.
Step 2: Set up the Growing Environment
Once your kit is prepared, it’s time to set up the growing environment. Place your kit in an area with good air flow to promote healthy mushroom growth. Avoid areas with direct sunlight, as too much light can harm the mushrooms.
Your kit should be kept in a place where the temperature stays stable, ideally between 60-75 degrees Fahrenheit. Use a spray bottle to mist the kit daily, as maintaining humidity is crucial for the mushrooms to thrive.
It’s essential to check the moisture level regularly to make sure the environment does not dry out. The best mushroom grow kits often come with a humidity tent or cover that can help retain moisture. Setting up the right environment ensures that your mushrooms grow strong and healthy.
Step 3: Initiate the Growth
To start the growth phase, observe the mushroom kit for signs of white, thread-like structures known as mycelium. These indicate that your kit is ready to produce mushrooms. Begin by making small cuts or holes in the kit where you want the mushrooms to emerge.
This allows the mushrooms to break through the surface easily. Use your spray bottle to mist these areas lightly but regularly to keep them moist. Consistent moisture is key to encouraging growth. You should see small mushroom pins, or baby mushrooms, starting to form within a week.
Keep the environment stable by maintaining proper humidity and avoiding direct sunlight. Check on your kit daily to ensure it stays moist but not waterlogged. Adjust the ventilation if needed to prevent mold from growing. With careful attention, your mushrooms will grow rapidly and soon be ready for harvest.
Step 4: Maintenance and Care
Taking care of your mushroom kit is easy but important. Make sure to keep the room clean to avoid any germs that could hurt your mushrooms. Check the moisture level every day and spray the kit with water if needed. Also, keep the kit out of direct sunlight as too much light can harm the mushrooms.
If you see any signs of mold, adjust the airflow and clean the area around the kit. It is also helpful to remove any dead mushrooms to keep the environment healthy. With a little care and attention, your mushrooms will grow well and be ready to harvest in no time.
Step 5: Harvesting
Harvesting your mushrooms is the most rewarding part of the growing process. To start, keep an eye on the size and color of your mushrooms; they are ready when the caps open up and the gills are visible. Gently twist and pull the mushrooms from the base to avoid damaging the surrounding mycelium.
This helps ensure new mushrooms can grow in the future. Make sure to harvest them regularly, as leaving mushrooms too long can affect the growth of new ones. Once picked, you can use them right away in your favorite dishes or store them in the fridge for later use.
Freshly harvested mushrooms will last a few days in the refrigerator. Remember to keep the growing area clean and continue misting daily after harvesting. This practice will help maintain the environment for future harvests. With patience and care, you can enjoy multiple harvests from your kit.
Step 6: Post-harvest
After you’ve harvested your mushrooms, it’s important to take a few steps to prepare for future growth. Start by cleaning the kit of any leftover mushroom bits to keep the growing environment healthy.
Make sure to keep misting the substrate regularly, as moisture is key for continued growth. If you see any dead mushrooms or mold, remove them right away to prevent contamination. It’s also a good idea to move the kit around from time to time to ensure it gets fresh air.
Keep an eye on the humidity levels and adjust as needed. With proper care, your kit can produce multiple harvests. Dispose of the substrate when it no longer produces mushrooms and start with a fresh kit.
Keeping the growing space clean and maintaining the right conditions will give you the best chance for future success. Enjoy the process and the fresh mushrooms you’ve grown at home!
Learn How to Grow Your Own Mushrooms Kit Now
When you grow your own mushrooms kit at home, it is not only fun but also rewarding. With a bit of effort and care, you can enjoy fresh, tasty mushrooms without ever leaving your house. The process is straightforward and doesn’t require a lot of space or money.
So, why not give it a try? Follow the steps, keep an eye on your kit, and soon you’ll be harvesting your own delicious mushrooms. Enjoy the journey and happy growing!
Did you find this article helpful? Check out the rest of our blog.